With Under the Cabinet Lighting!
Those of you whom are home owners with the real thing might laugh,
but for us apartment dwellers...it makes a big difference in the kitchen.
So, with no further ado....Husband!
Hello world!
As described in a previous entry, we added under cabinet lighting, using rope lights strung end to end.
We have only 2 cabinets, both small, that are right next to each other and very close to an electrical outlet that we could plug our lights into. Depending on your kitchen, that may affect how you set your lighting up.
First, I got out the measuring tape and measured the distance the lights would need to run along the inside edge underneath our cabinets.
After totaling up all of the distances I wrote down, I went to Home Depot's website and found out the lengths of rope lights that were sold.
In our case, we needed 16 ft. of lighting but they only sell 2ft., 6ft., 12ft., 18ft., and a few more longer segments.
So I bought 2 x 2ft. ropes and 1 x 12ft. rope to equal our 16ft.
These lights are great because they can be strung together and securely screwed to each other, with no extra wire in between like Christmas lights would.
I also bought an extra set of mounting brackets since each rope only comes with a couple and not enough to properly hang the ropes securely and flush with the cabinet.
So here's the final shopping list:
2 two foot rope lights
1 twelve foot rope light
1 set of extra mounting brackets
(These numbers and lengths can vary depending on the size and how you would like to light your kitchen)
I started the rope light near the wall closest to the outlet I wanted to use.
The brackets should also be placed no more than 1 1/2 feet in between them.
With each bracket, I clipped in the rope light and pulled it taught.
When I came to a corner, I positioned my rope light as I wanted it to sit, and used that to position where my bracket should go. Then I put the braket at a 45 degree angle in that corner to properly bend the light round the corner and keep it flush.
 |
| Putting the rope in to guide the placement of your bracket will give the rope room to bend while keeping it close to edges. |
Katie suggested just going over the edge but doing it closer to the wall. This does well to hide the cross-over when you are enjoying the lighting from within the kitchen or standing outisde of it (if you are sitting looking up at it, you are going to see everything no matter what!).
 |
| My wife is so smart! |
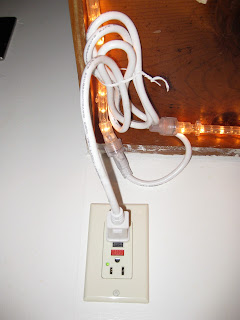
Since the outlet was so close we had a lot of extra chord so I simply coiled it up and used the twist tie that it came packaged in to keep it together and twist tied it to my rope light that was secured right there and it keeps the project much neater (You can see this in my first pic at the top).
Now I just plugged in the lights and enjoyed the difference the extra lighting made.


No comments:
Post a Comment